Welcome to MyRoswell
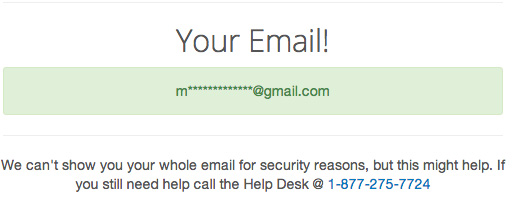
Forgot Email
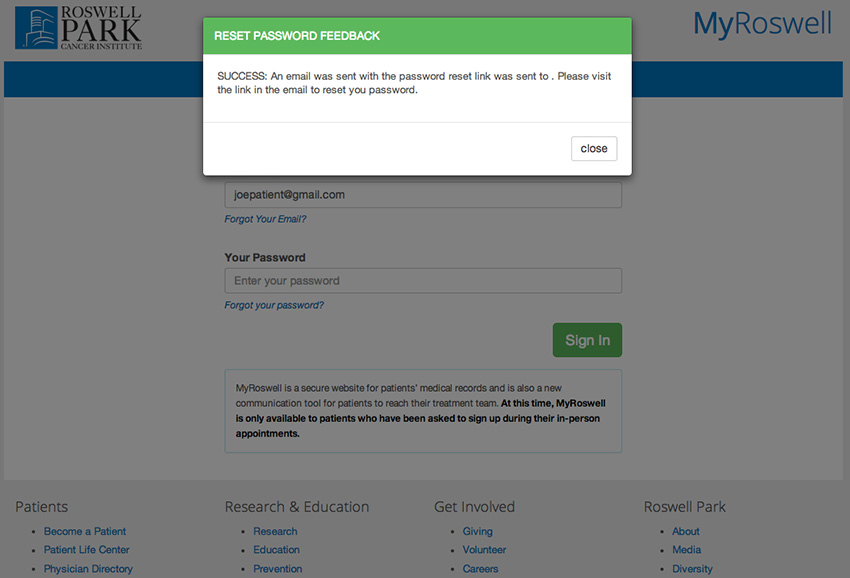
Forgot Password
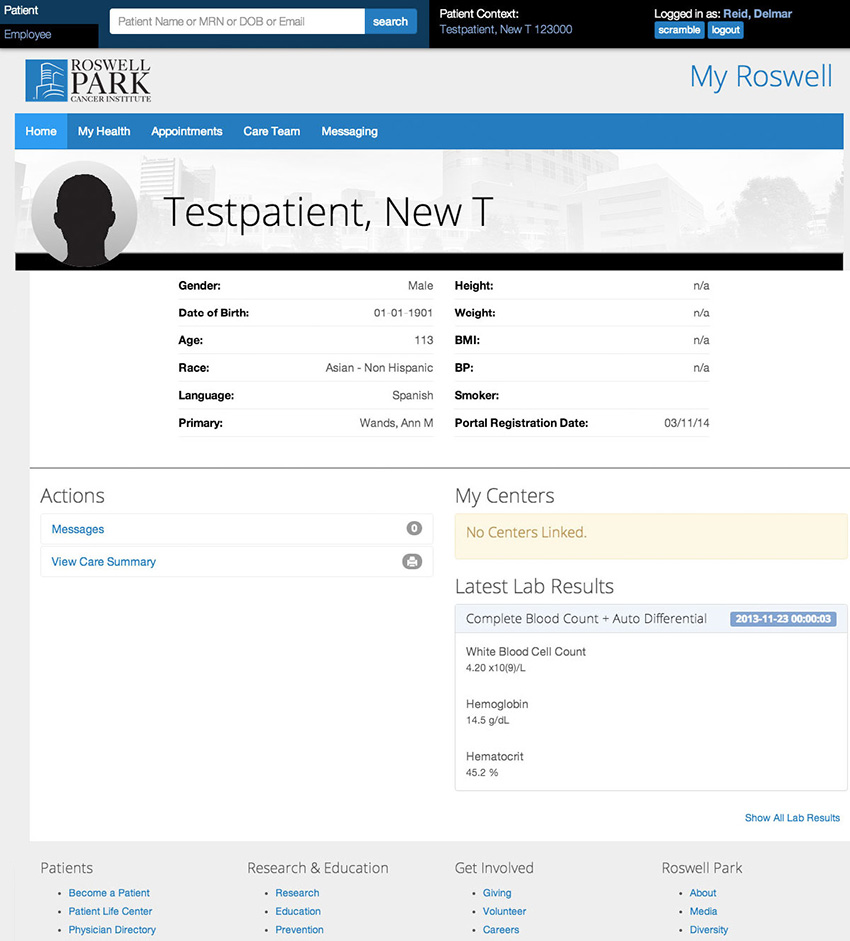
Homepage
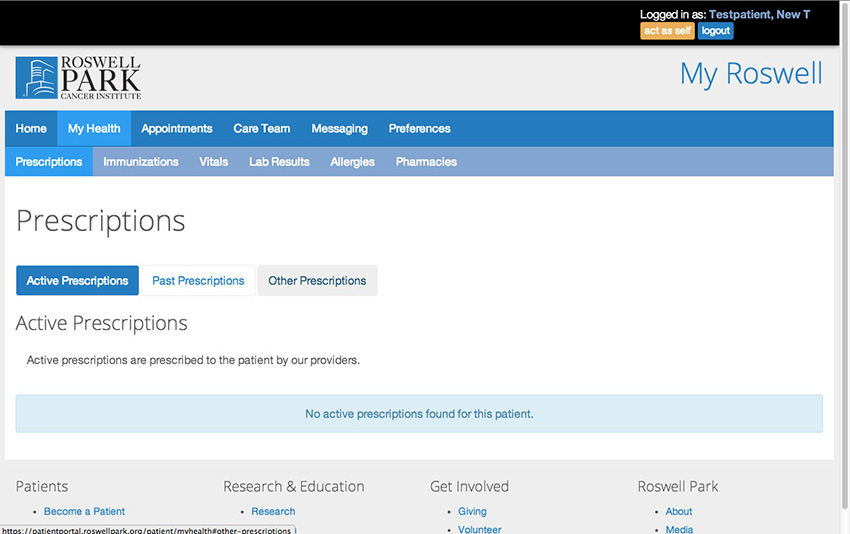
My Health
In the top row of the menu next to the home link is "My Health." Underneath "My Health” is a sub-row of pages within that section.
Active Prescriptions
"My Health" defaults to the "Active Prescriptions" page—which lists any current medications prescribed.
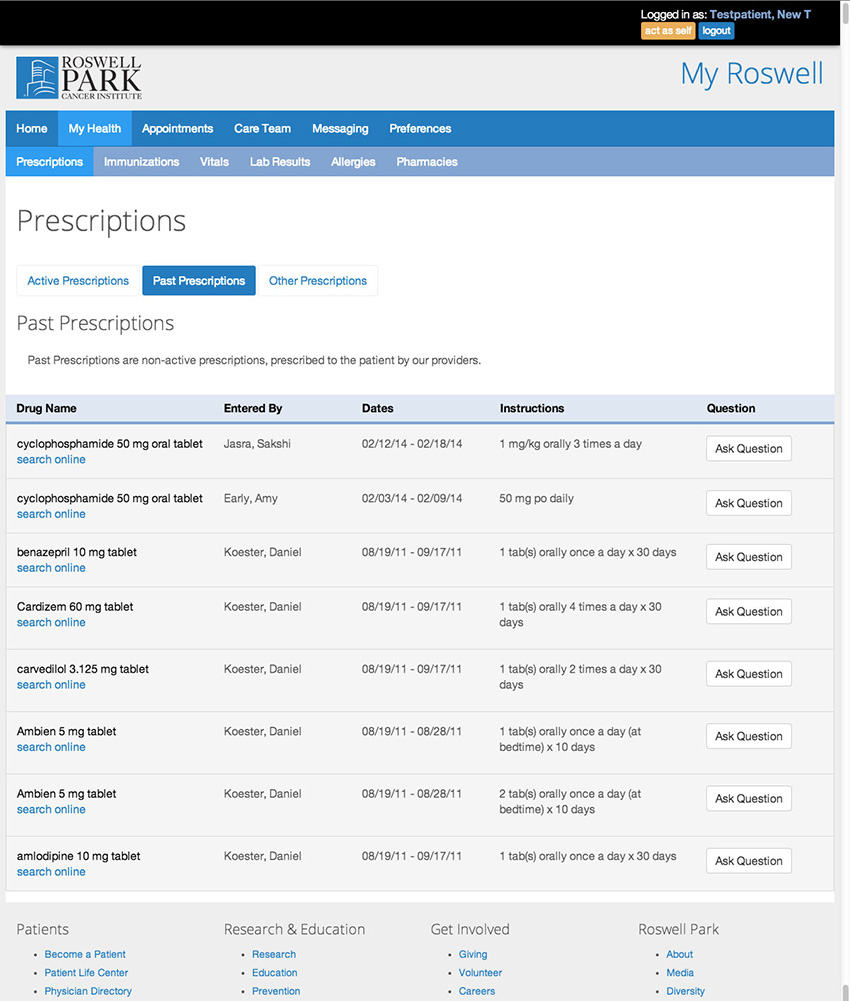
Past Prescriptions
Clicking on the "Past Prescriptions" tab will let you view previous prescriptions prescribed by Roswell Park providers.
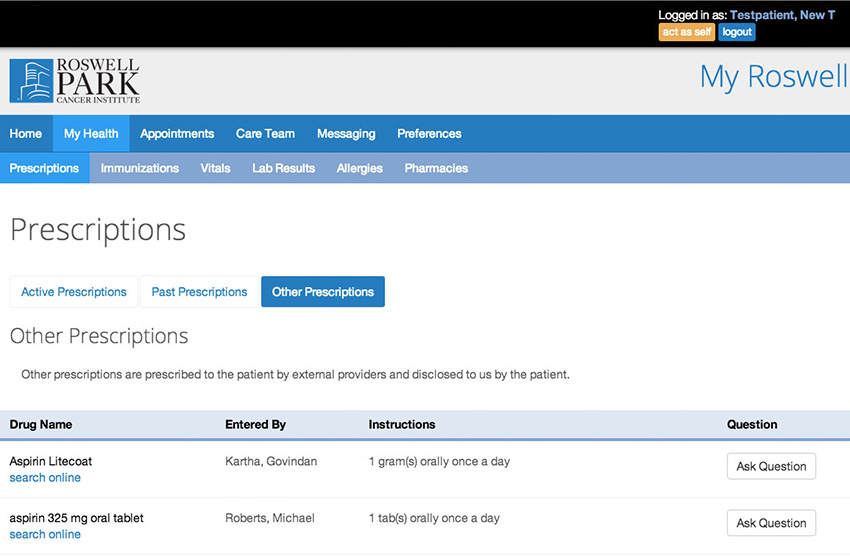
Other Prescriptions
Clicking on the "Other Prescriptions" tab will let you view prescriptions you are taking that were not prescribed by Roswell Park.
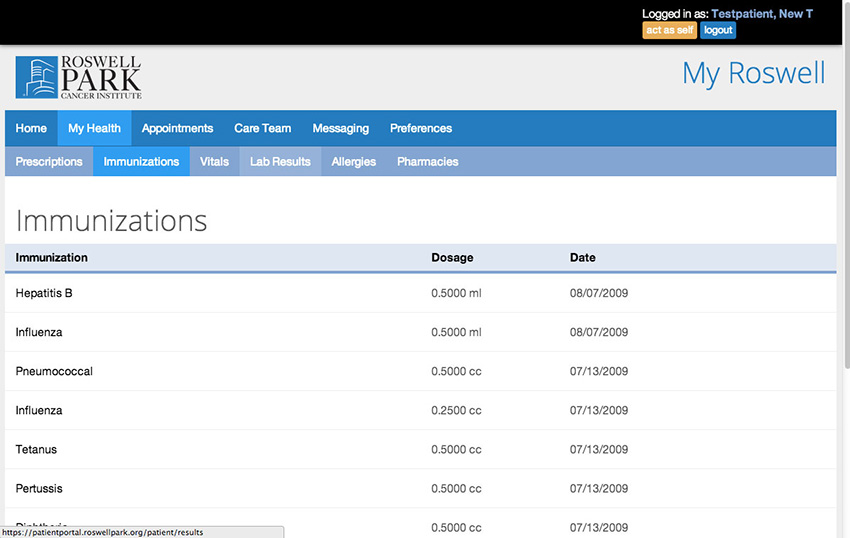
Immunizations
Under "My Health" is the Immunizations tab, which displays all immunizations along with date administered and dosage given.
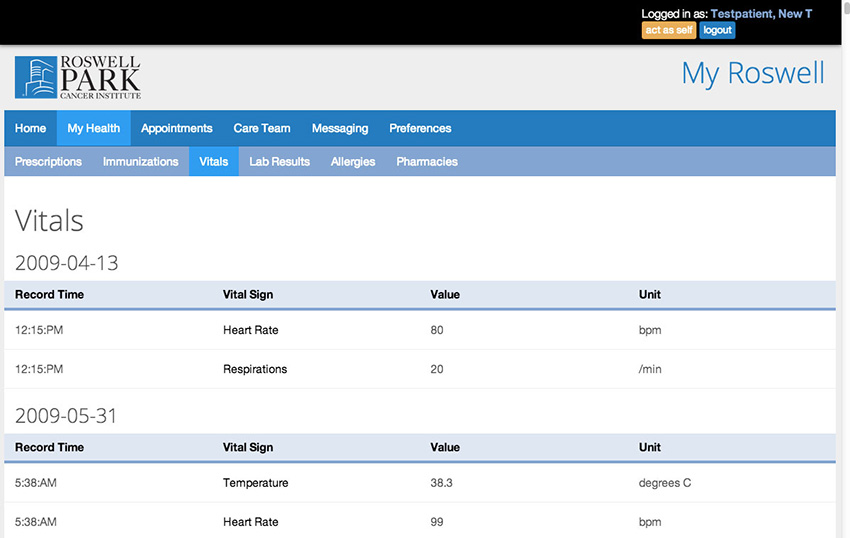
Vitals
Under "My Health" is the Vitals tab. This displays the history of your vitals taken during your appointments.
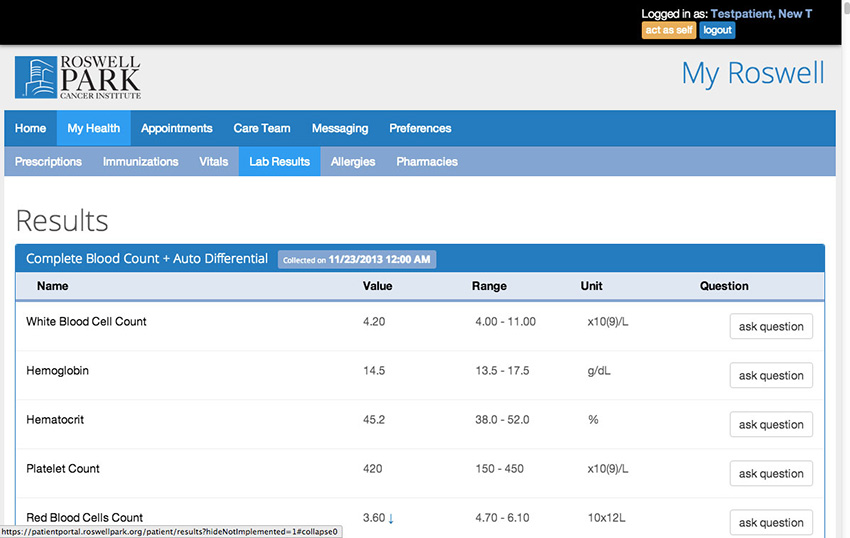
Lab Results
Under "My Health" is the Lab Results tab. This displays the history of lab tests taken during your visits including date and time.
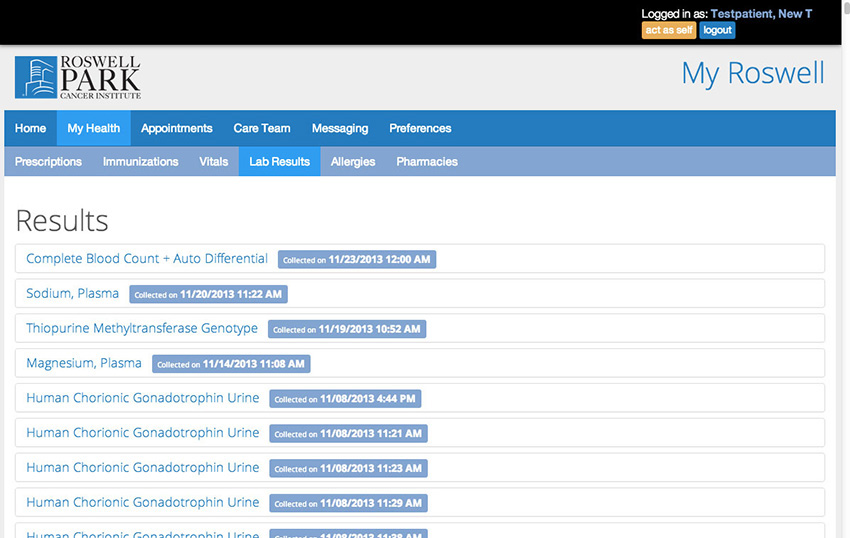
While in Lab Results, clicking a specific lab test will open to specific details about the test.
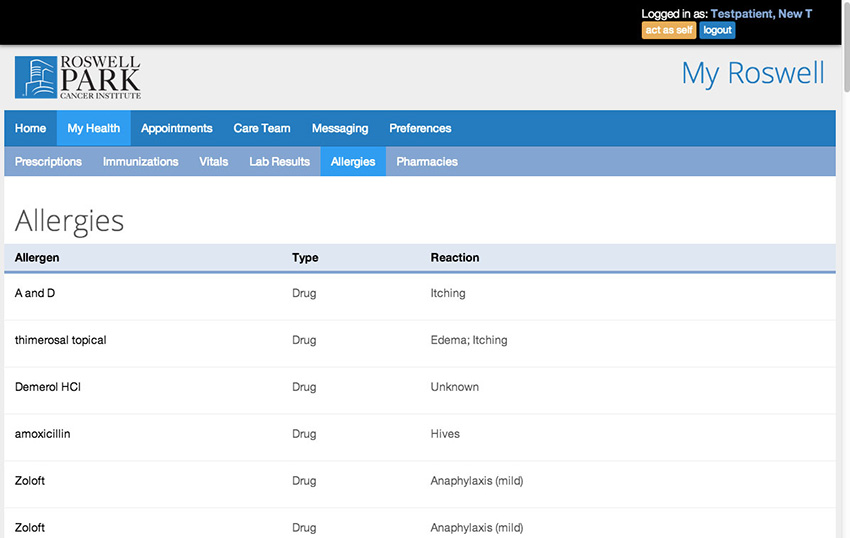
Allergies
Under "My Health" is the Allergies tab. All known/reported allergies and allergic reactions are listed.
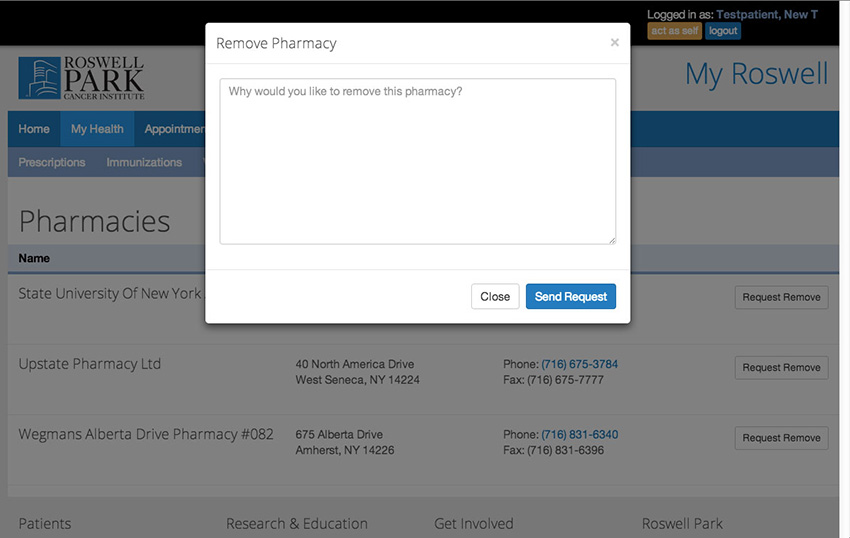
Pharmacies
Under "My Health" is the Pharmacy tab. This displays your preferred pharmacy (or pharmacies), address(es) and contact number(s).
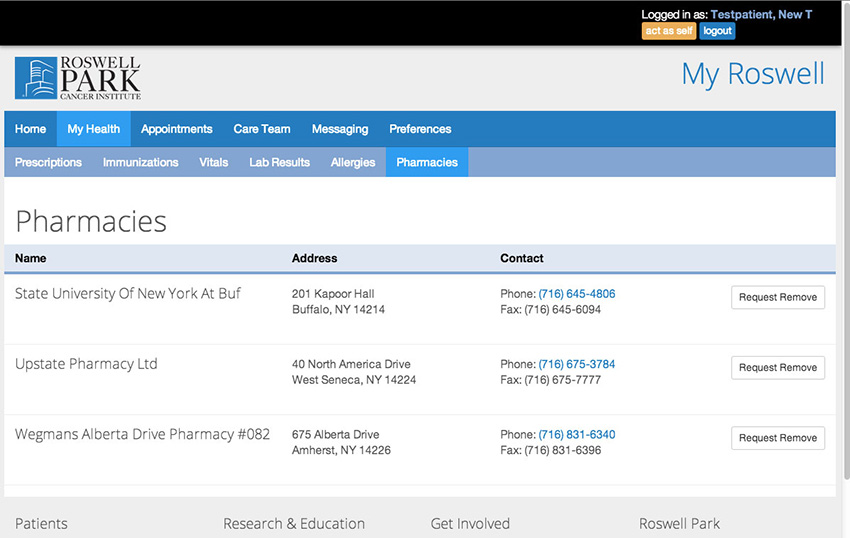
Clicking the "Request Remove" button next to a pharmacy will remove the pharmacy from the list.
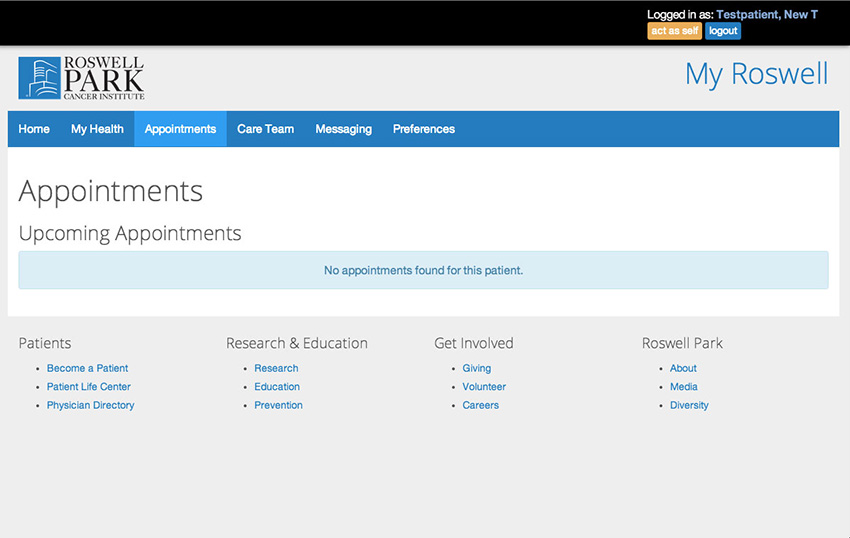
Appointments
In the top row of the menu is "Appointments." This is where all of your upcoming appointments are listed.
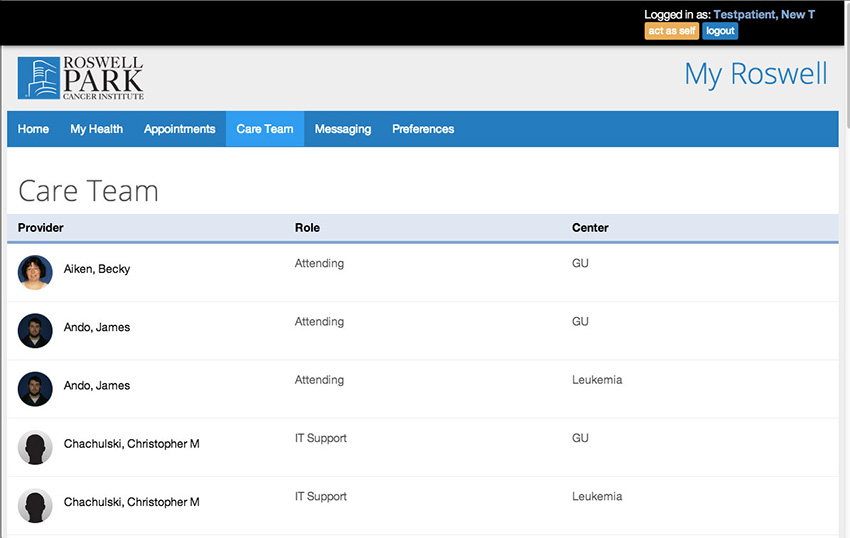
Care Team
In the top row of the menu is the "Care Team." Clicking on Care Team will show you a list of all Roswell Park faculty and staff that are assigned to your care team.
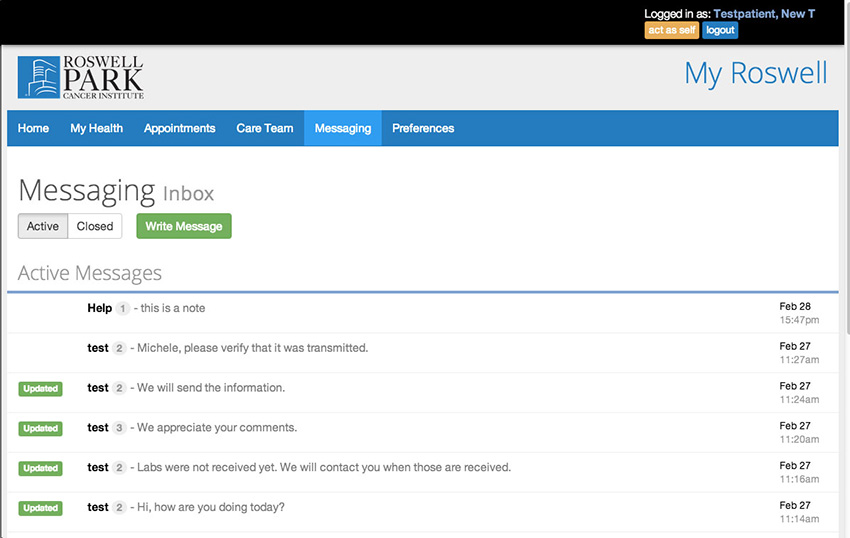
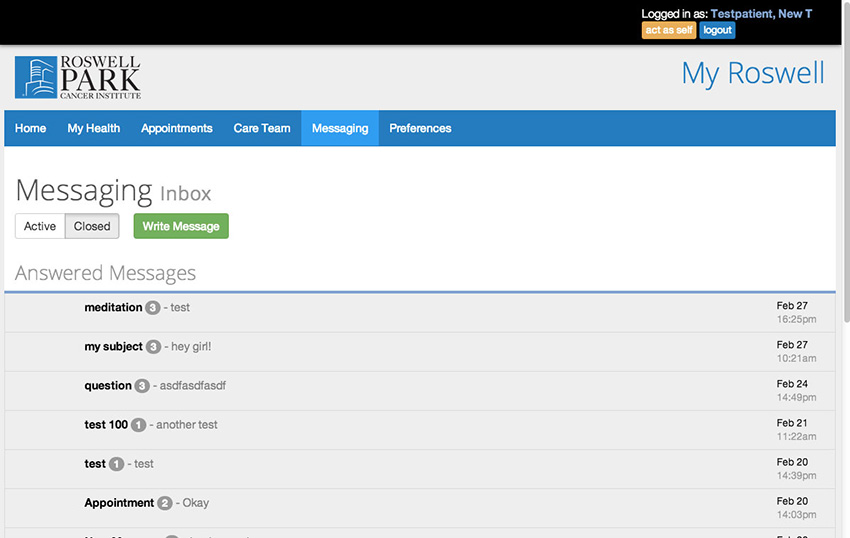
Messaging
In the top row of the menu is "Messaging." Clicking on Messaging will bring you to your inbox. If you haven't written a message to your care team your inbox will be empty. If you have written a message, and it's still active, it will be listed here.
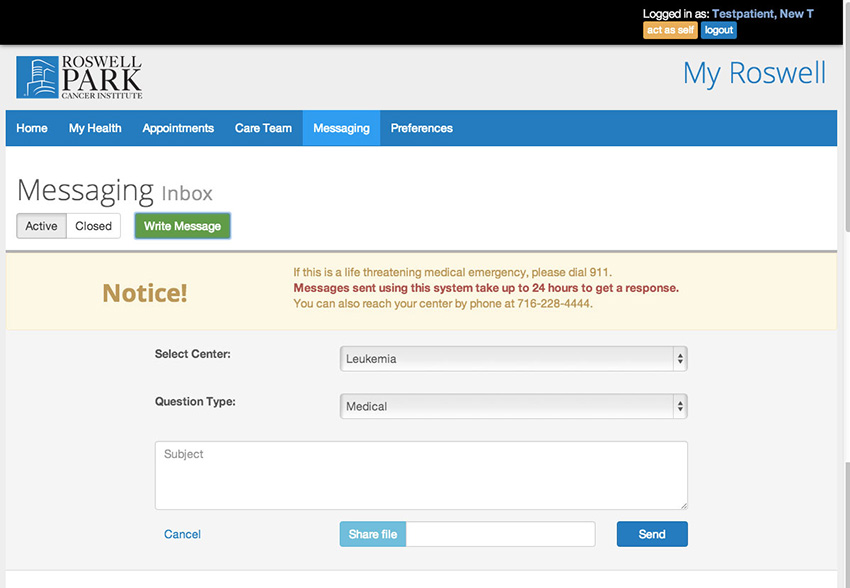
Messaging: Writing Messages
To write a message, click the "Write Message" button and the following screen will appear. Select the center affiliated with your care. (You may have more than one care center — depending on your treatment.) Choose the type of question from the choices provided. Type in a subject and message in the boxes provided.
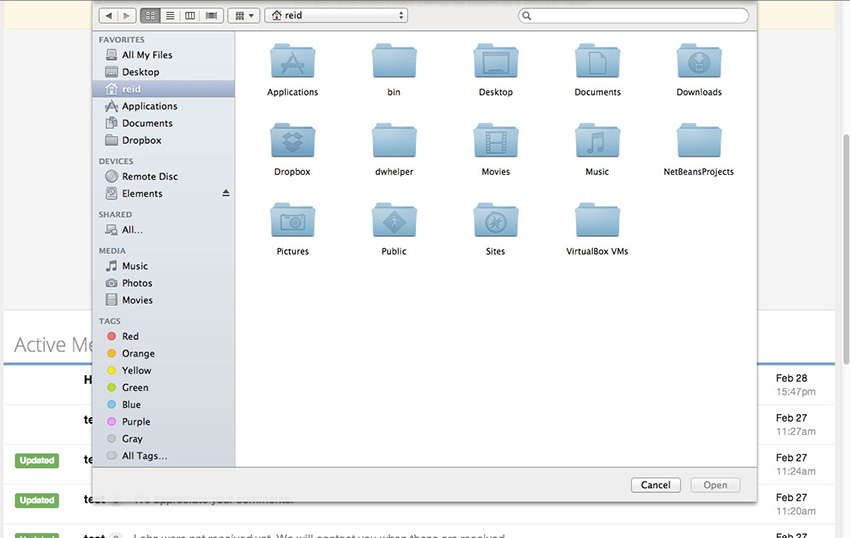
Messaging: Attaching a File
If you need to attach a file with the message, click on the "Share file" button and select a file from your computer. Once a file is selected it will show in the "Share file" box. When finished, click on the "Send" button.
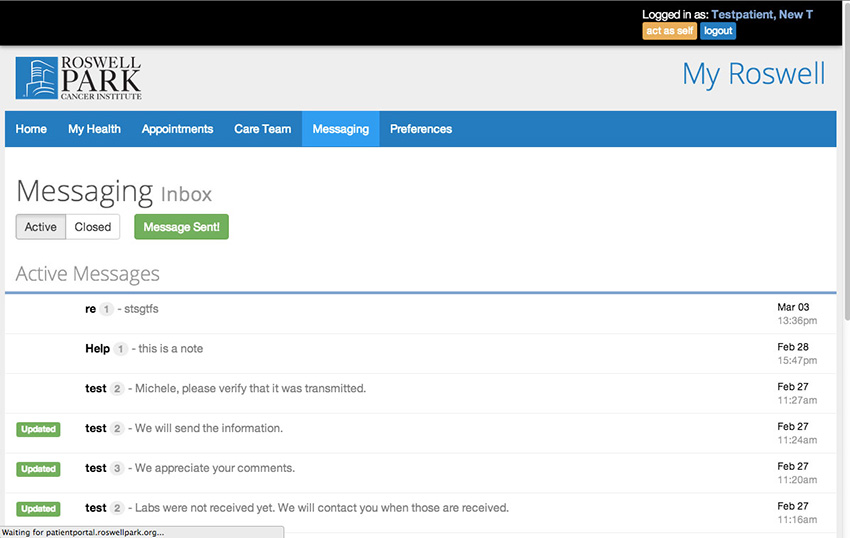
Messaging: Sent Confirmation
Once your message is sent you will see a green icon stating "Message Sent."
Messaging: Opening a Message
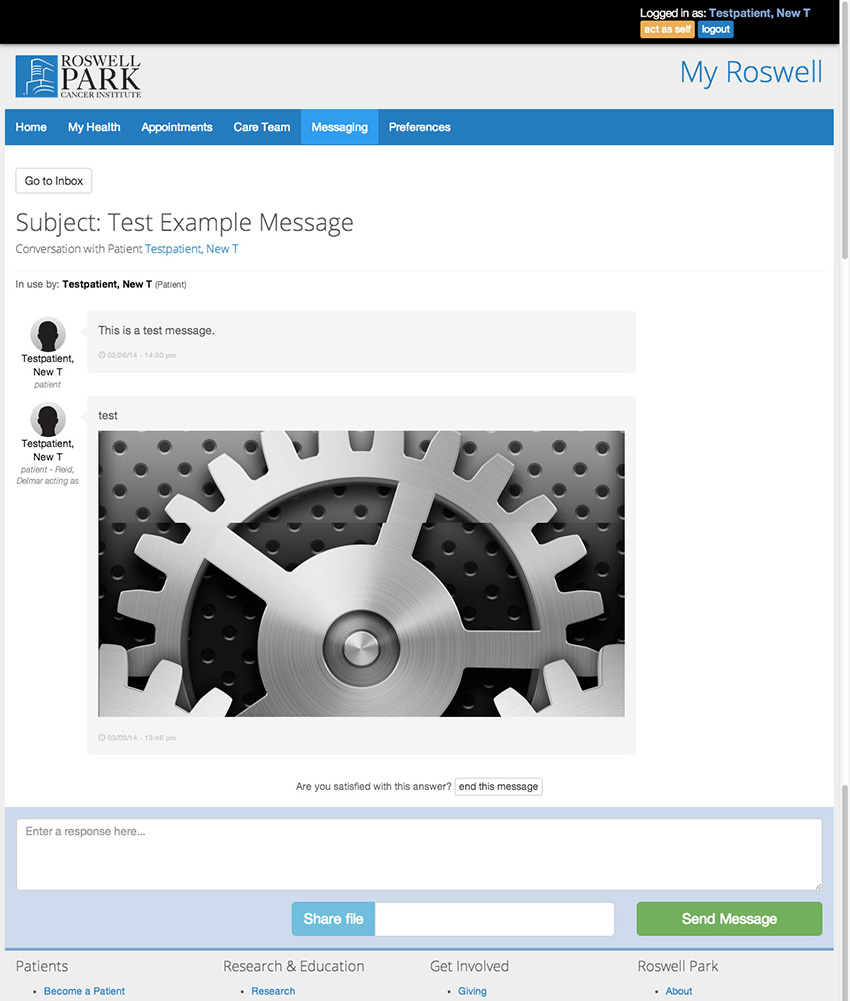
To open a message, double-click on the message subject.
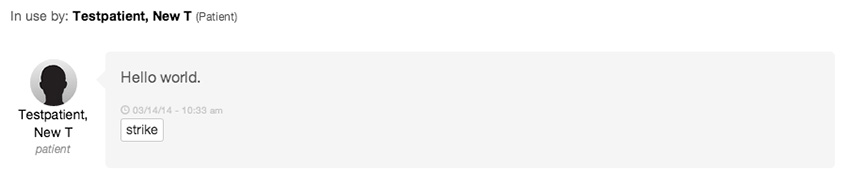
Messaging: Striking a Message
When you write a message to your care team it becomes part of your medical record. Your messages cannot be deleted. However, if you write a message and later want your care team to disregard the message, you can "strike" the message.
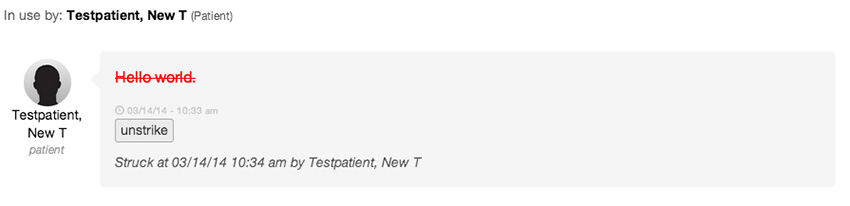
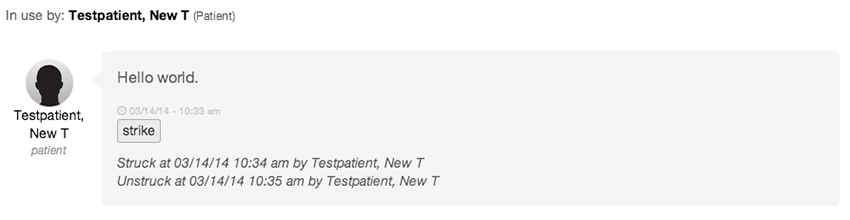
Messaging: Unstriking a Message
If you accidentally 'strike' a message, you can "unstrike" a message by clicking the "unstrike" button.
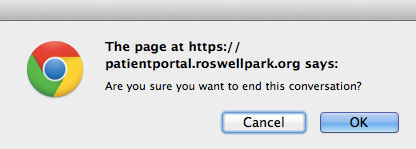
Messaging: Closing a Message
Closing a message means ending a message thread and filing it away in your “Closed” inbox. Only close a message once you are satisfied that your questions or messages related to your subject thread have been fulfilled.
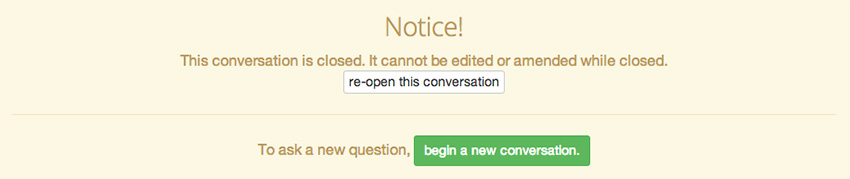
Messaging: Closing a Message Confirmation
Once a message is closed you will see a confirmation message. If you have another question related to this message you must start a new conversation.

Messaging: Archived Messages Inbox
Your “closed” messages are viewable within the “Archived” tab.
Messaging: Re-opening a Message
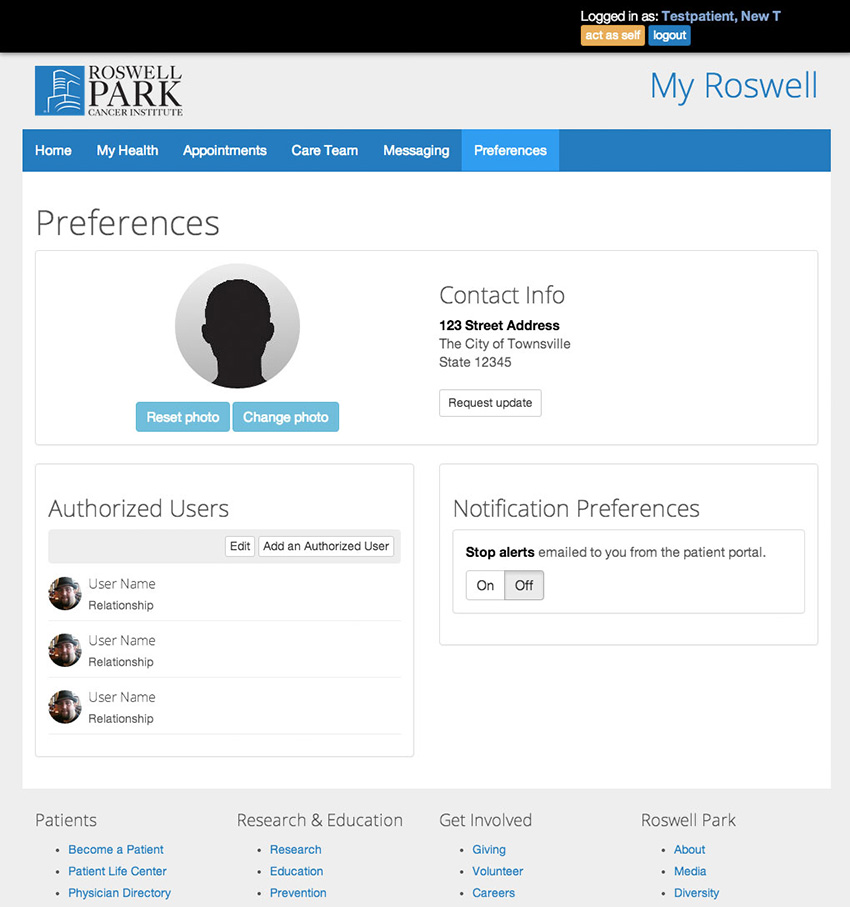
Preferences
Patient preferences are managed within the “Preferences” tab. This page lists details such as contact info, a photo of the patient and any authorized users of the patient’s portal designated by the patient.
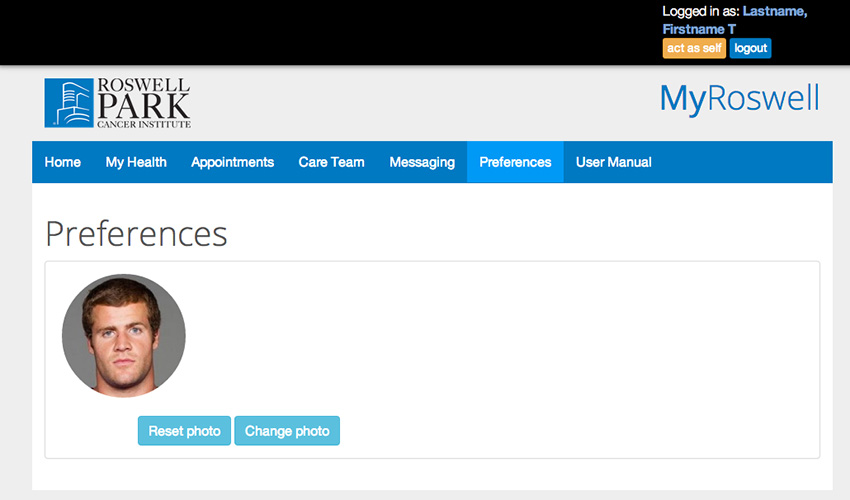
Preferences: Change Photo
To change a photo, click on the "Change Photo" button. You can select a personal photo from your own files to upload to your portal. Please note: this must be an image file. (Image file titles end with .gif, .jpg, or .png)

Preferences: Change Photo Result
When you have successfully changed your photo you will see a photo in a box on the page.
Preferences: Reset a Photo
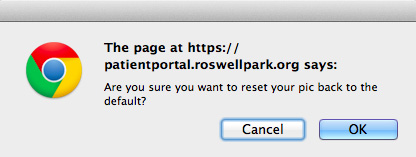
To remove a photo, click on the “Reset photo” button under the current photo. A prompt will ask you to confirm that you want to remove your photo.
Preferences: Reset Photo Result
Once a photo is reset you will see the default image below.

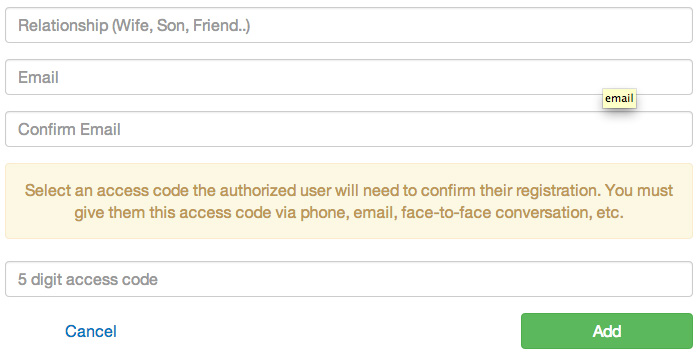
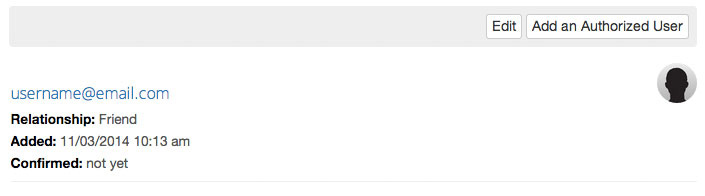
Preferences: Authorized Users
Authorized users are friends and family members that you have given permission to access your portal account health information. Authorized users can see your lab results and health information and communicate with your clinical centers through the portal messaging system. Any messages sent by an authorized user will be labeled with their name, not yours, to document that they sent the message.
In order to add an authorized user, click the "Add an Authorized User" button and fill out the form, including a PIN number that you will choose and share with the authorized user. The authorized user will then be sent a confirmation email with a link. When they click on the link, they will need to enter the PIN that you gave them in order to complete the process. If you need assistance, please call the MyRoswell Helpdesk at 1-800-767-9355.
(See images below for more information.)